- 인터넷은 우리에게 자유를 주었습니다. 저희는 자유를 얻기 위해 지식을 통합하고 체계화하고 공유합니다. 랜선 위 정글에서 살아남기 위해 저희는 시키는 일만 하는 꿀벌 대신 고객을 위해 창조하고 혁신하는 게릴라가 되겠습니다.
- 024042463
- 01032667931
- [email protected]
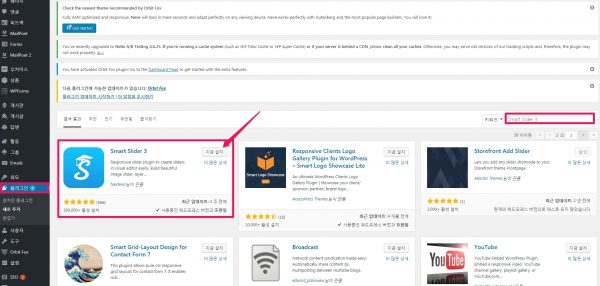
[추천]Smart Slider 3 plugin : 워드프레스 웹디자인을 완성시켜주는 플러그인. 슬라이더를 만들고 웹 사이트의 어느 곳에나 배치 할 수있는 플러그인
개요
- 버전: 3.3.11
- 글쓴이: Nextend
- 최근 업데이트: 3 주 전에
- 요구되는 워드프레스 버전: 4.6 또는 이상
- 호환되는 버전: 5.0
- PHP 버전 요구사항: 5.4 또는 이상
- 활성 설치: 300,000+
스마트 슬라이더 3는 슬라이더를 만들고 웹 사이트의 어느 곳에나 배치 할 수있는 플러그인입니다.
슬라이더의 모양이나 내용을보다 잘 제어해야하는 경우 Smart Slider 3이 가장 적합합니다. 정말 사용하기 쉽고 라이브 비주얼 편집기에서 각 레이어를 사용자 정의 할 수 있습니다 . 가장 중요한 부분은 필요한 모든 기능을 갖춘 완전히 무료 버전을 사용할 수 있다는 것입니다. 모든 스마트 슬라이더 3 버전은 Elementor에서 무료 및 프로 버전으로 잘 작동합니다.( Smart Slider 3 and Elementor, 참고로 이 플러그인에 대한 국내 자료는 거의 없습니다. )
저는 개인적으로 이 플러그인이 정말 완성도 높은 웹디자인을 완성시켜준다는데 매우 만족하고 있으며 특히 Elementor plugin 과 함께 사용할 수 있다는 점이 정말 매력적입니다. Smart Slider 3과 Elementor를 함께 사용하시어 워드프레스 사이트의 웹디자인을 완성해 보세요.
무료 대안 도구
구글에서 무료로 제공하는 훌륭한 대안인 구글 웹 디자이너도 고려해보세요. 상세 사용법에 관한 한글 자료는 부족한 편이나 구글 자체에서 제공해 주는 자료는 매우 풍부합니다. 단한가지 걸림돌은 쉬어질때까지 연마하셔야 한다는 점입니다. (하느님은 이 세상을 주셨지만 노력하지 않고 얻을 수 있는 것은 없습니다. 이 도구도 마찬가지 입니다.)
[추천]구글 웹디자이너, Google Web Designer : 강력한 웹 디자인 도구이며 HTML5 광고 랜딩페이지용 디자인 도구
설치 및 활성화
동영상 자료
아래의 유튜브 채널에 가면 어마어마한 조회수의 동영상 교재가 완벽하게 준비되어 있습니다.
https://www.youtube.com/channel/UCTBKML0ujQUgN5r7ePNyjjQ
자습서 비디오 를 포함한 20개의 동영상으로 이루어진 동영상 재생목록을 첨부합니다.
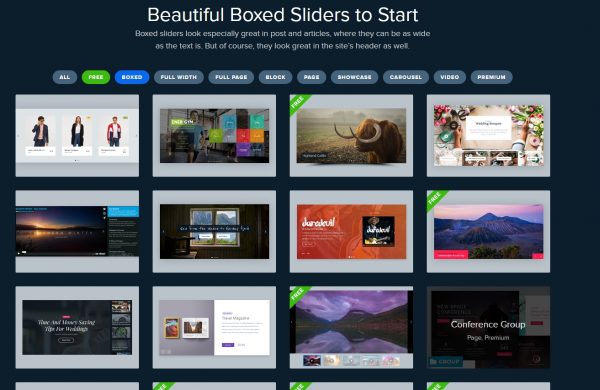
click하시면 이 플러그인으로 만들 수 있는 다양한 샘플 슬라이더를 만날 수 있습니다.
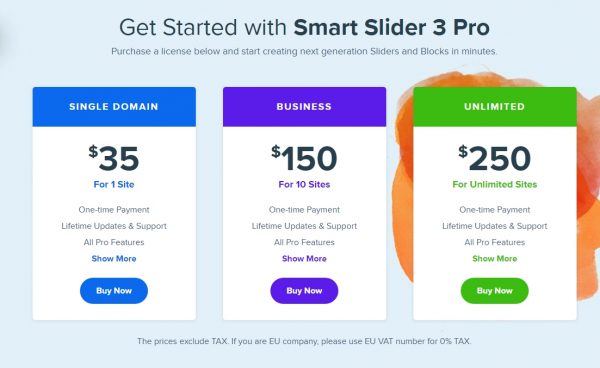
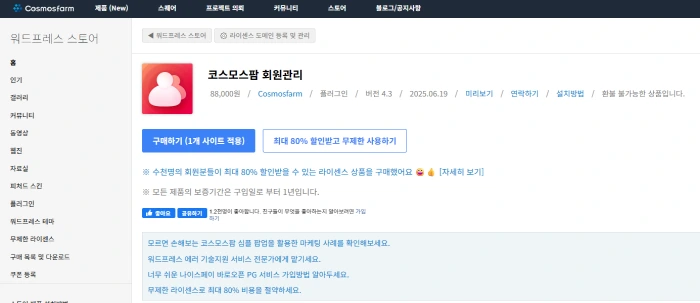
사용 사이트 갯수 제한 없음이 $250 입니다. 탐납니다.
One-time Payment
Lifetime Updates & Support
All Pro Features
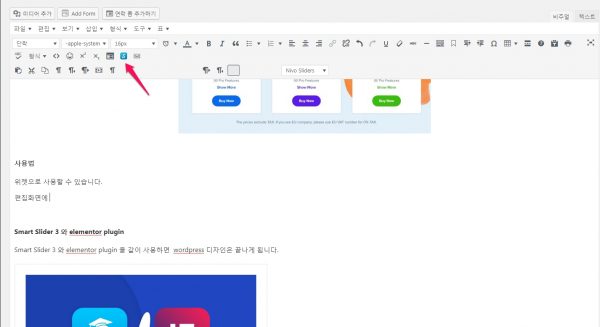
사용법
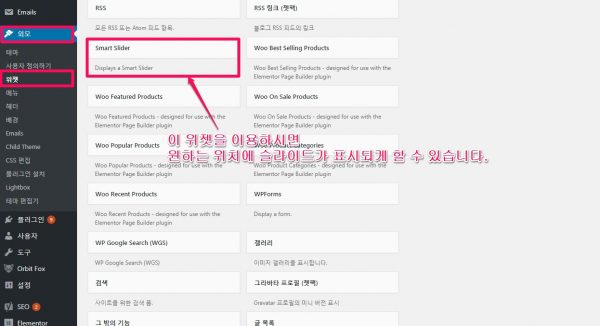
위젯으로도 이용할 수 있습니다.
[외모] -> [위젯]으로 이동하시면 [Smart Slider]위젯이 만들어진 것을 확인할 수 있습니다. 원하는 위치로 배치하시고 표시되기를 원하는 슬라이드를 선택하여 이용하세요.
편집화면에서 바로 가기 아이콘을 이용하여 바로 편집할 수 있습니다.
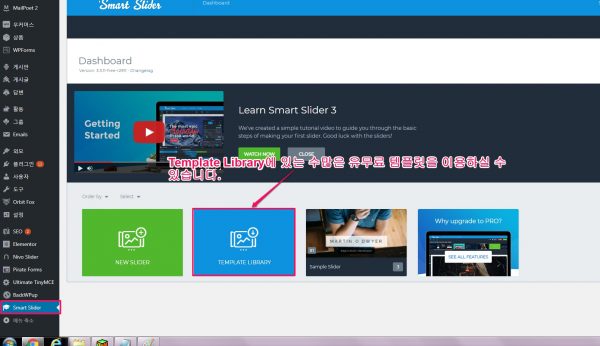
Dashboard (Main page)

Dashboard(대쉬보드)
이 메뉴 포인트는이 메인 페이지 로 연결되며 모든 슬라이더를 볼 수 있으며 새로운 슬라이더를 만들 수 있습니다.
Settings(설정)
여기에서 설정을 하시면 모든 슬라이더에 적용됩니다.
Go Pro
유료 상품을 알아보고 구매할 수 있습니다.
Help
비디오를 찾고 사용 설명서에 연결할 수 있습니다. 또한 여기에서 지원을받을 수 있으며 뉴스 레터를 구독할 수 있습니다.

( 이미지 출처 : Inteface – Dashboard (Main page) https://smartslider3.helpscoutdocs.com/article/389-main-page )
이것은 귀하의 슬라이더 목록입니다. 또한 여기에 새 슬라이더를 만들 수 있습니다. 템플릿 라이브러리 에서도 가져올 수 있습니다 .

( 이미지 출처 : Inteface – Dashboard (Main page) https://smartslider3.helpscoutdocs.com/article/389-main-page )
슬라이더를 드래그 앤 드롭하여 순서를 변경할 수 있습니다. 또한 “주문”옵션이 있습니다.
선택 옵션을 사용하면 슬라이더 중 일부를 선택하고 삭제, 복제 또는 내보내기 할 수 있습니다.
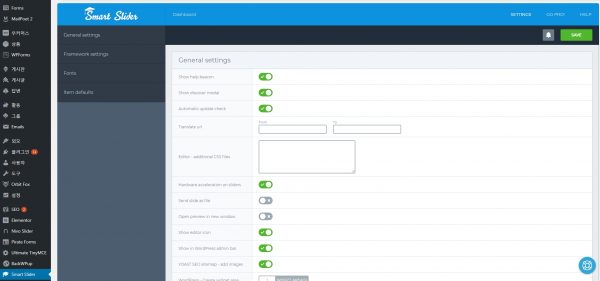
Settings(설정)
여기에서 설정을 하시면 모든 슬라이더에 적용됩니다.
General settings, Framework settings, Fonts, Item defaults 을 설정할 수 있습니다. 보다 자세한 것은 더 사용해보고 올리겠습니다.
Slide editor
Smart Slider 3 PRO – Slide Editing I. – Basics 동영상(1:40)
Navigation bar( 탐색 바 )

여기에서 슬라이더와 슬라이드에 연결할 수 있습니다. 미리보기에서 슬라이더가 현재 상태인지 확인할 수 있습니다. 장치 옵션을 사용하면 작은 디스플레이에서 슬라이더를 볼 수 있으므로 응답 을보다 자세하게 설정할 수 있습니다 . 당신은 찾을 수 있습니다 간단한 / 전문가 스위처를 더 많은 옵션을 보려면 벨 알림, 화살표는 / 파멸위한 조치를 다시 실행, 당신은 저장하거나 편집을 취소 할 수 있습니다.
( You can reach your sliders and slides from here. In the preview you can check out your slider in it’s current state. With the device options you can see your slider on a smaller display, so you would be able to set it up more responsively. You can find the simple/expert switcher to see more options, the bell is for notifications, the arrows are for undoing/redoing your actions, and you can save or cancel your editing. )
슬라이드 설정( Slide settings )

(이미지 출처 : Interface – Slide editor https://smartslider3.helpscoutdocs.com/article/402-interface-slide-editor )
배경 이미지와 같은 슬라이드 의 설정 이나 슬라이드의 크기가 다른 경우 해당 이미지가 슬라이드를 채우는 방법을 찾을 수 있습니다 .
( You can find here the settings of your slide, like it’s background image, or how that image should fill up the slide, if it has different size from it. )
Toolbar( 툴바 )

(이미지 출처 : Interface – Slide editor https://smartslider3.helpscoutdocs.com/article/402-interface-slide-editor )
장부 아래에서 슬라이드 편집기 영역에 대한 일부 표시 옵션을 찾을 수 있으며 다른 아이콘은 레이어 설정에 대한 바로 가기입니다 .
(Under the cog you can find some display options for the slide editor area, and the other icons are shortcuts for the layer settings. )
Layers( 레이어 )

(이미지 출처 : Interface – Slide editor https://smartslider3.helpscoutdocs.com/article/402-interface-slide-editor )
슬라이드에 넣을 수있는 텍스트, 이미지 및 기타 내용입니다. 녹색 + 아이콘을 눌러 목록에 액세스하거나 바로 가기 아이콘을 사용할 수 있습니다.
( These are the texts, images and other contents you can put down into your slides. You can access the list by pressing the green + icon, or use the shortcut icons: )

(이미지 출처 : Interface – Slide editor https://smartslider3.helpscoutdocs.com/article/402-interface-slide-editor )
Layers list( 레이어 목록 )

(이미지 출처 : Interface – Slide editor https://smartslider3.helpscoutdocs.com/article/402-interface-slide-editor )
이것은 귀하의 레이어 목록과 시간 표시 막대 위에있는 애니메이션입니다. 화면 왼쪽 하단에있는 레이어 목록 버튼을 눌러이 목록에 액세스 할 수 있습니다.
( This is a list of your layers, and the animation on them on a timeline. You can access this list by pressing the Layer list button in the bottom left side of your screen: )

다른 아이콘은 애니메이션을 시작하는 재생 버튼입니다. ( The other icon is the Play button, which would start your animations. )
Layer ordering( 레이어 순서 지정 )
레이어를 드래그 앤 드롭하여 레이어를 정렬 할 수 있으며 상위 레이어는 하위 레이어의 맨 위에 위치합니다.
( You can order your layers by drag ‘n dropping them, and the higher layer will be on top of the lower layers. )

(이미지 출처 : Interface – Slide editor https://smartslider3.helpscoutdocs.com/article/402-interface-slide-editor )
Slide editor( 슬라이드 편집기 )

(이미지 출처 : Interface – Slide editor https://smartslider3.helpscoutdocs.com/article/402-interface-slide-editor )
이것이 슬라이드의 모양입니다. 레이어를 놓고 이동하고 크기를 조정하고 레이어 윈도우를 통해 설정에 액세스 할 수 있습니다 .
(This is how your slide looks like. You can put down your layers on it, move and resize them and access their settings through the Layer window.)
Layer window( 레이어 창 )

(이미지 출처 : Interface – Slide editor https://smartslider3.helpscoutdocs.com/article/402-interface-slide-editor )
여기에서 레이어의 설정을 볼 수 있습니다. 레이어를 클릭하면이 창에 액세스 할 수 있습니다.
(This is where your layer’s settings are. You can access this window, if you click on your layer:)

다른 설정에 액세스 할 수있는 네 개의 탭이 있습니다.
(There are four tabs, where you can access different settings: )
Layer( 레이어 )

(이미지 출처 : Interface – Slide editor https://smartslider3.helpscoutdocs.com/article/402-interface-slide-editor )
제목 옵션의 텍스트 또는 이미지 레이어의 이미지와 같은 기본 옵션. 특정 설정 에서 확인하십시오 .
( Basic options, like the text of your heading layer, or the image of your image layer. Check out this in their specific settings. )
Design( 디자인 )

(이미지 출처 : Interface – Slide editor https://smartslider3.helpscoutdocs.com/article/402-interface-slide-editor )
레이어 의 글꼴 및 스타일 설정.( The font and style settings of your layer.)
애니메이션

(이미지 출처 : Interface – Slide editor https://smartslider3.helpscoutdocs.com/article/402-interface-slide-editor )
레이어 애니메이션 은 레이어 애니메이션 으로 이동하거나 이동할 수 있습니다 .
( Your layers can be moved in and out with layer animations. )
Settings(설정)

(이미지 출처 : Interface – Slide editor https://smartslider3.helpscoutdocs.com/article/402-interface-slide-editor )
여기에서 레이어에 시차 효과를 추가 할 수 있습니다. 당신은 그것을 돌릴 수 있고, 그것의 반응 행동을 바꿀 수 있습니다 . 여기 에있는 옵션들에 대해 더 많이 읽을 수 있습니다
(This is where you can add parallax effect to your layer. You can rotate it, change it’s responsive behaviour, etc. You can read more about the options in here.)
7 Comments
[…] [추천]Smart Slider 3 plugin : 워드프레스 웹디자인을 완성시켜주는 플러그인. 슬… […]
[…] [추천]Smart Slider 3 plugin : 워드프레스 웹디자인을 완성시켜주는 플러그인. 슬… […]
Greetings from Colorado! I’m bored to tears at work so I decided to check out your site
on my iphone during lunch break. I really like the knowledge you provide here
and can’t wait to take a look when I get home.
I’m amazed at how fast your blog loaded on my mobile
.. I’m not even using WIFI, just 3G .. Anyhow, superb blog!
You need to be a part of a contest for one of the most useful blogs online.
I most certainly will highly recommend this website!
Greetings from Idaho! I’m bored to tears at work so I decided to check out your blog
on my iphone during lunch break. I love the information you provide here and
can’t wait to take a look when I get home.
I’m surprised at how quick your blog loaded on my mobile ..
I’m not even using WIFI, just 3G .. Anyhow, good site!
Thankfulness to my father who informed me about this web site,
this website is really remarkable.
It’s a pity you don’t have a donate button! I’d without a doubt donate to this outstanding blog!
I suppose for now i’ll settle for book-marking and adding your RSS
feed to my Google account. I look forward to fresh updates and will talk about this blog with my Facebook group.
Chat soon!